

Biometric verification without storage confirms that a real person is present without turning their face into a lasting record. But “we don’t store images” is only the start. Enterprise teams need to know what the system processes, where it runs, what leaves the device and what remains after a decision. A sound design makes each of those boundaries explicit and testable.
What Does “Without Storage” Actually Mean?
Verification answers a narrow question: is a real person here, right now? Identification answers a different one: who is this person? A presence check can run without building an archive of face images.
“Without storage” should describe a data lifecycle, not a label. A system may hold camera frames in memory for a moment to reach a result. That is processing, not storage. To test the claim, break it into four questions:
- Is the original image retained?
- Is a derived biometric representation, such as a template or embedding, retained?
- Does any input leave the device?
- What result or metadata stays in the application?
“We don’t store faces” answers the first question. A credible vendor answers all four.
VerifEye is built around those questions. The selfie is deleted as soon as it becomes a Face Credential, a 512-byte biometric representation from which a face image cannot be recreated. Review the VerifEye platform and our security information as part of any evaluation.
How Biometric Verification Without Storage Works
VerifEye’s flow has four stages. Each one changes what data exists, which is why it helps to name them.
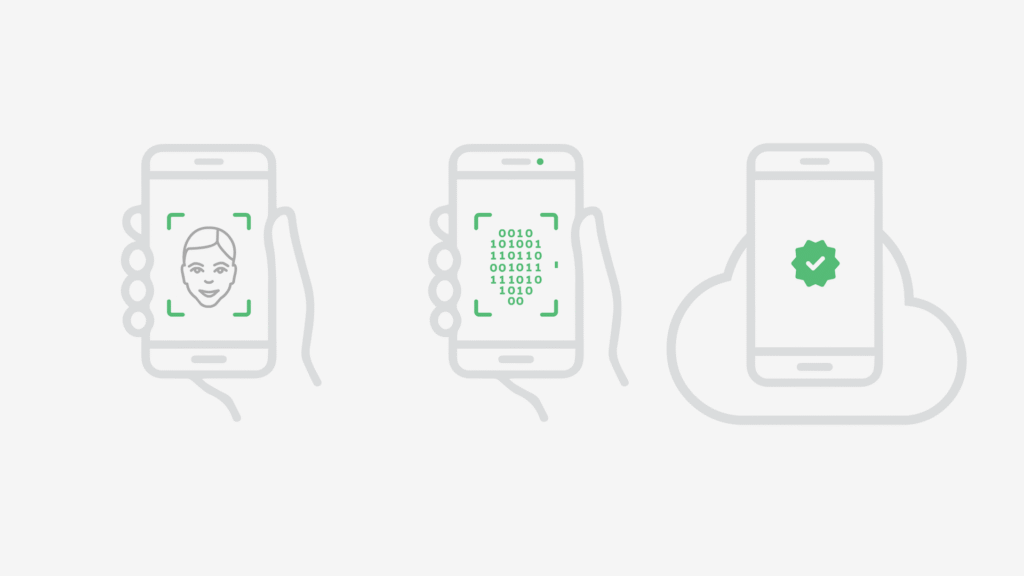
- Check liveness and match the selfie. The user grants camera access and takes a selfie. VerifEye confirms a live person is present, not a photo, screen or mask, and runs the selfie match.
- Convert the image to a Face Credential. The selfie becomes a 512-byte Face Credential and is then deleted. A face image cannot be recreated from the credential.
- Bind the credential to other attributes. The Face Credential links to the attributes your journey needs, such as the user’s account.
- Store the credential on device or in the cloud. You choose where it lives. Later checks, such as reverification or account recovery, compare a fresh live check against the credential, not against a stored photo.

That fourth step is the key distinction. Biometric verification without storage doesn’t mean nothing is stored. It means no face image is stored. What persists is a compact credential that works for matching but can’t be turned back into a face.
Take onboarding as an example. A new user grants camera access and completes the check in seconds. The selfie is gone by the time their account is created. What remains is a Face Credential bound to that account, plus whatever outcome and timestamp your support process needs. Retention, access and deletion are still your policy decisions, so keep the minimum evidence for a defined purpose.
Architectures differ widely. Research on cloud-assisted biometric identification describes systems that offload storage and identification to servers, while work on biometric authentication with deduplication shows how storage choices shape design. Both show why buyers should ask what is stored, in what form and where.
What Data Should Enterprise Teams Map?
Map the full information path before you approve a deployment. Include the device, the verification component, your application, analytics and support tooling. The model may never save an image while a debug log quietly captures one.
| Data or event | Why it's processed | What to ask about storage |
|---|---|---|
| Camera frames | Input for the live check | Processed locally? Sent, cached, recorded or exposed in error handling? |
| Face Credential or other biometric template | Supports uniqueness checks and later reverification without keeping an image | Where is it stored, on device or in the cloud? What is it bound to? Who can access, revoke or delete it? |
| Decision result | Lets the application enforce its policy | What is returned? Does your application keep it, and why? |
| Session and diagnostic events | Reliability, abuse analysis and troubleshooting | Do logs hold identifiers or payloads? Who can access them and when are they deleted? |
| Consent and policy records | Documents the basis for the interaction | What must you record for this jurisdiction and use case? Where does it live? |
Next, draw the path from capture to deletion. For each step, label the owner, data type, purpose, storage state and access group. Then mark every boundary crossing: device to app, app to API, production to analytics and production to support. A reviewer should be able to trace one session and see where its image, result and metadata exist at each point. Our facial verification privacy framework goes deeper on this exercise.
Include Your Observability Tools
Routine tooling is where data most often slips through. A crash report can capture a request payload. Session replay can record a camera screen. Verbose logging switched on for one rare bug can stay on for months. Scope diagnostics rather than avoiding them. Use synthetic data, restrict production debugging, redact sensitive fields and set expiry dates.
Why On-Device Processing Reduces Data Exposure
When frames stay on the device, fewer systems ever touch them. That means fewer services, credentials, network paths and people who could expose an image. It also gives reviewers a simpler architecture to assess than a design that uploads raw input.
On-device processing is not a full security program, though. The app still holds account identifiers and results. A compromised endpoint can affect what happens before or after the check. And “on device” doesn’t mean nothing leaves the device. A Face Credential stored in the cloud, for example, travels by design. Confirm the exact messages and service calls your integration makes.
Ask the vendor how the flow behaves when things go wrong. What happens if the network drops, camera permission is denied or processing fails? Can the user retry? Can support staff see submitted input? Do test and production handle data the same way? Short, concrete answers beat a broad privacy claim.
How to Test a Biometric Verification Without Storage Claim
Turn the claim into requirements that engineering, privacy, fraud and support teams can each verify. Six steps cover it.
- Define the decision. Is this onboarding, abuse deterrence, account recovery or a high-risk action? Write down what a pass permits and what a fail or inconclusive result triggers.
- Draw the data flow. Cover the capture point, processing location, network transfers, result destination, logs and every fallback route. Mark trust boundaries and owners.
- Ask about each data type separately. That means raw images, templates or embeddings, session metadata, identifiers, result codes and diagnostics. “No images” is not an answer about derived data.
- Confirm retention and deletion. Get the period and deletion method for each retained category, including backups, logs and vendor support systems. Record who can trigger deletion and how it is confirmed.
- Test the failure paths. Run a clean pass, an interrupted session, a denied permission and an inconclusive result. Inspect network traffic, caches, logs and analytics each time. Use the production configuration, because debug builds often handle telemetry differently.
- Cover accessibility and ownership. Offer another route for people who can’t complete the check, and avoid endless retry loops. Assign owners for policy, data, incidents and support
A simple worksheet keeps the review honest: claim, evidence, test owner, outcome. “No camera frame reaches our servers” should map to a named method, such as network inspection during the test. If the only evidence is a vendor statement, label it that way. For the wider architecture review, see our face verification API enterprise fit guide.
Match the Check to the Journey Moment
Purpose should decide when you ask for verification, not habit. Onboard anchors a real, unique person at account creation. Reverify confirms it is still the same person when risk changes. Protect adds a human-presence step to a sensitive action, such as a payout or a password change. Recover gets a locked-out user back in, often from a new device, so it needs a carefully designed fallback.
What Should a Pilot Measure Beyond Storage?
A design can be sound on paper and still frustrate users. So set a scorecard before rollout, compare against a baseline and segment results by device and user group.
- Completion and abandonment: where do users drop out, and does the check interrupt the journey?
- Retries and inconclusive results: how often do they happen, and what guidance helps users recover?
- Decision quality: how are false accepts and false rejects reviewed for this use case?
- Abuse and support impact: does the check stop the targeted pattern, and what new tickets does it create?
- Privacy in practice: do observed data flows match the documented design?
Set thresholds before results arrive. Otherwise any movement looks like a win. Agree who reviews exceptions, how long the pilot runs and what triggers expansion or a pause.
What “No Storage” Doesn’t Prove
A no-storage design is one part of a system’s data handling. It doesn’t prove resistance to spoofing, which needs presentation attack detection evidence. It doesn’t make the surrounding application free of personal data. And a presence result alone doesn’t establish legal identity, age, account ownership or uniqueness. If your decision needs one of those, specify it and choose evidence that supports it.
Uniqueness is a different check, not a stronger presence check. It compares a derived embedding or Face Credential against existing records to confirm a person hasn’t already enrolled. Onboard runs this check to anchor a real, unique person on day one. An embedding or Face Credential is not an image, and a face image cannot be recreated from it. That is how VerifEye confirms uniqueness without keeping a single face image on file.
To see where VerifEye fits in your flow, start with our GDPR-compliant liveness detection approach and the VerifEye API integration guide.
Frequently Asked Questions
Does biometric verification without storage mean no data is processed?
No. Verification has to process an input to reach a result. “Without storage” means images and biometric data aren’t retained afterward. Ask what is processed, where it happens and what remains.
Is a biometric template the same as a face image?
No. A template or embedding is derived data used for comparison or analysis. In VerifEye, a face image cannot be recreated from it. For any vendor, ask whether one is created, kept or reused.
Does a human-presence check prove someone’s identity?
Not on its own. It confirms a real person is taking part. Legal identity, age, account ownership and uniqueness each need a separate check. Uniqueness, for example, matches embeddings against existing records.
How can a team test whether images are retained?
Agree the test method with security and privacy owners first. Then, in a controlled pilot, inspect requests, caches, logs and diagnostics across passed and failed sessions. Use synthetic or approved test data.